

A dryer vent can look clean at the opening while still having lint and other restrictions farther inside the exhaust system. The good news is that some straightforward dryer vents can be cleaned by a homeowner, as long as the system is accessible and the work can be done safely.
Hi, I’m Greg! I’ve spent more than 25 years working on residential appliances, and in this guide I’ll walk you through how to clean an accessible dryer vent, what to look for before you start, and when it’s better to call a professional.
Cleaning and maintaining your dryer vent is about more than helping clothes dry faster. A restricted exhaust system can reduce airflow, increase drying time, and cause the dryer to operate less efficiently. Lint buildup in a dryer or exhaust duct can also contribute to excessive heat buildup and fires in some dryers. The U.S. Consumer Product Safety Commission recommends cleaning the lint screen or filter before or after each load and cleaning the dryer vent and exhaust duct periodically. U.S. Consumer Product Safety Commission. The U.S. Fire Administration reports that failure to clean was the leading contributing factor in the ignition of clothes dryer fires in homes from 2018 through 2020, at 31%. U.S. Fire Administration
Can You Clean Your Dryer Vent Yourself?
In some cases, yes. A short, uncomplicated dryer vent with safely accessible ends may be a reasonable homeowner maintenance job.
Before gathering your tools, understand the three areas people commonly refer to as the “dryer vent”:
- Lint screen: The removable filter that catches lint before air leaves the dryer.
- Transition duct: The short connection between the dryer exhaust outlet and the building exhaust duct.
- Building exhaust duct: The duct that carries warm, moist air through the building and outdoors.
Cleaning the lint screen is routine maintenance and should be done after every load. Cleaning the exhaust system is a different job because it involves access, cleaning equipment, and proper reassembly.
This guide focuses on the accessible exhaust system. It does not involve removing dryer cabinet panels or trying to clean internal components inside the dryer.
When should you have the vent professionally cleaned?
Not every dryer vent is suitable for DIY cleaning.
Professional service is a better choice when the system has:
- A roof outlet
- A high exterior outlet requiring a ladder
- A long or complicated duct run
- Concealed or inaccessible sections
- Heavy blockages
- Animal nests or other obstructions
- Shared building ductwork
- An inline exhaust fan or other equipment you cannot identify
If you cannot safely reach and inspect the entire system, don’t assume that cleaning the portion you can reach means the whole vent is clean.
Tools and Safety Preparation Before You Start
The exact equipment you need depends on the dryer and vent configuration, but a basic cleaning job may require:
- A flashlight
- Work gloves
- Eye protection
- A vacuum with suitable attachments
- A dryer vent cleaning kit appropriate for the duct
- An appropriate hand tool for an accessible clamp, if necessary
- The dryer and vent instructions
- The cleaning kit’s instructions
Do not assume that every dryer vent cleaning kit works with every type of duct. Check the cleaning kit and dryer manufacturer’s instructions before using a brush or powered tool.
A kit with a long enough set of rods is not automatically appropriate for your particular vent. The brush, rods, attachment method, and operating instructions all matter.
Disconnect power before hands-on work
Turn the dryer off, allow it to cool completely, and disconnect electrical power before working on the vent.
Pull the plug rather than the cord. If you cannot reach the plug safely, don’t try to pull the dryer out by force.
Keep the dryer cabinet panels in place. Cleaning the exhaust vent does not require live electrical testing, bypassing safety devices, or taking the appliance apart.
If you have a gas dryer, do not disconnect the gas line just to make room for vent cleaning unless the manufacturer’s instructions specifically call for it and you are qualified to do so. If safely accessing the vent requires disconnecting or reconnecting the gas supply, have a qualified professional handle that work. Manufacturer guidance for moving gas dryers includes shutting off and disconnecting the gas supply before moving the appliance. Whirlpool
If you smell gas, stop immediately. Do not unplug the dryer or operate electrical switches. Leave the area and contact your gas utility or emergency services from a safe location.
Access and Inspect the Vent Before Cleaning
Once the dryer is turned off, cool, and safely disconnected from power, look at the vent connection behind the appliance.
If the dryer can be moved safely, protect the floor and move it slowly. Have another person help with a heavy appliance when necessary. Do not attempt to move a stacked dryer, unusually heavy appliance, or difficult installation by yourself. Manufacturer guidance also recommends assistance when moving a dryer. Whirlpool
Take a quick photograph of the visible connection before disconnecting anything. This can give you a useful reference when you’re putting it back together.
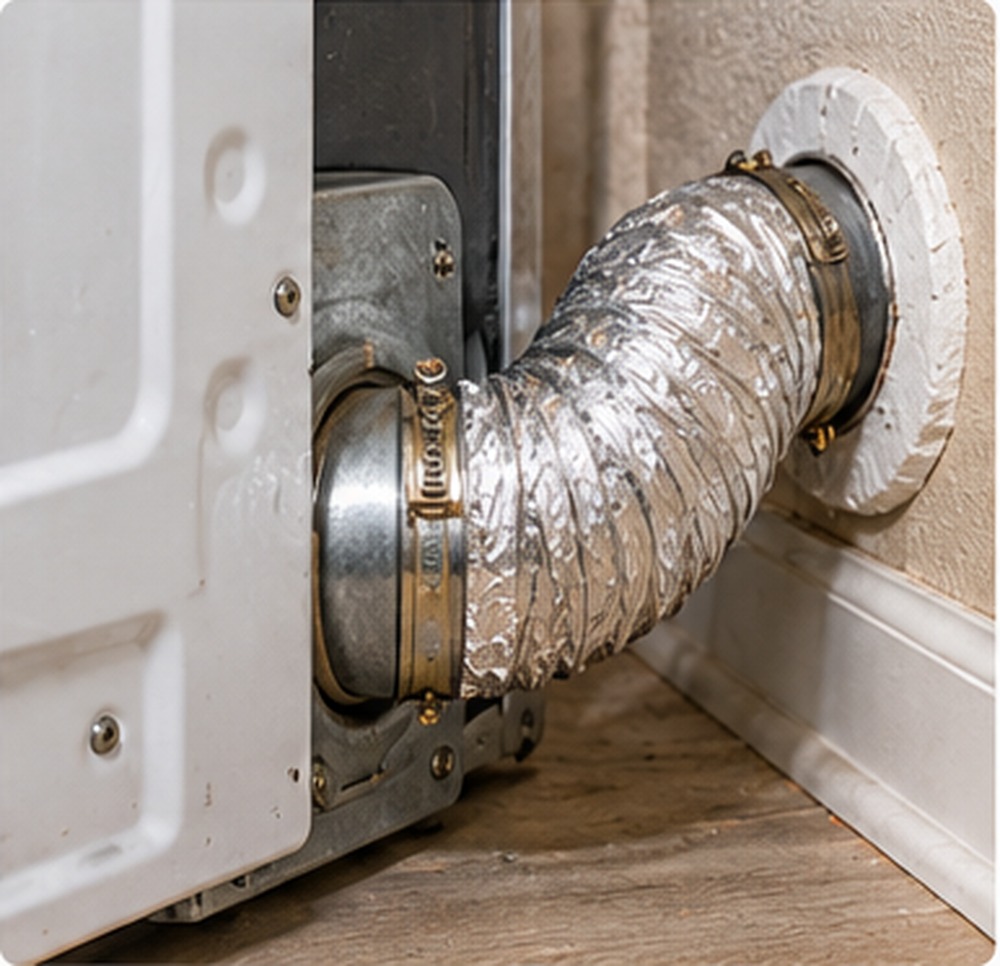
If the transition duct uses an accessible clamp, loosen it with the appropriate tool and gently release the duct. Do not pull hard on the duct or the dryer connection.
Inspect the vent before you start cleaning.
Look for:
- Crushed or sharply kinked sections
- Tears or holes
- Corrosion or badly deteriorated material
- Loose or disconnected joints
- Improvised connections
- Material that you cannot confirm is appropriate for dryer venting
If the vent is damaged, cleaning it does not make it safe. A damaged section should be properly corrected or replaced with appropriate venting.
Also inspect the outdoor termination if it is safely accessible from ground level. Do not climb onto a roof or use an unsafe ladder position just to reach the vent.
Clean the Accessible Dryer Vent Step by Step
Only continue if you’ve determined that the vent is appropriate for homeowner cleaning and you can work safely.
Keep the dryer turned off and disconnected from power throughout the cleaning process.
Step 1: Remove loose lint around the openings
Start by vacuuming loose lint around the accessible vent openings and the floor behind the dryer.
Work gently. The goal is to collect the lint rather than push it farther into the duct.
Do not push a vacuum attachment, brush, or other tool deep into the dryer itself. Internal dryer passages and blower areas are outside the scope of this homeowner cleaning procedure.
Step 2: Clean the transition duct
If the transition duct can be safely removed, support it while releasing the connections.
Inspect it for damage, then remove reachable lint using a suitable brush or vacuum attachment.
Be careful with flexible transition material. Do not stretch it, flatten it, or use a powered brush unless the equipment instructions specifically allow that application.
If the connector is damaged or unsuitable, replace it with an appropriate approved type rather than trying to repair a damaged section with tape.
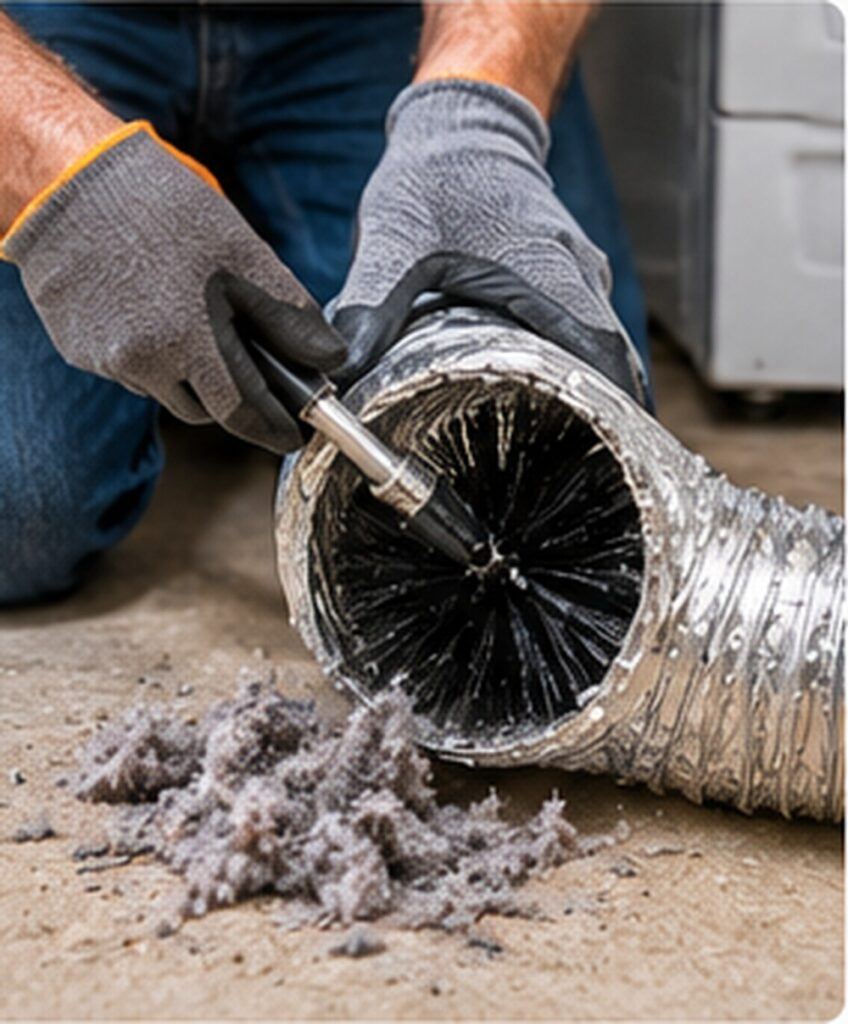
Step 3: Prepare the dryer vent cleaning kit
Before putting the brush into the building exhaust duct, make sure the cleaning kit is appropriate for the duct material and the approximate length of the vent.
Assemble the rods according to the kit instructions and make sure each connection is secure.
If the kit is designed to be used with a drill, follow the manufacturer’s instructions for drill use, speed, rotation direction, and withdrawal.
There is no universal drill speed or operating method that is correct for every dryer vent cleaning kit.
Step 4: Clean the building exhaust duct
Insert the brush into the accessible portion of the building exhaust duct.
Follow the cleaning kit’s instructions rather than forcing the brush through the duct.
Work slowly and allow the brush to loosen lint as intended. Collect loosened debris from accessible openings as you work.
Stop if you encounter unexpected resistance.
Do not respond to resistance by increasing drill power, forcing the rods forward, or repeatedly pushing against an obstruction. Resistance can indicate a bend, damaged duct, an obstruction, or a section that the cleaning equipment is not designed to handle. If the brush becomes stuck, stop and follow the cleaning kit’s instructions for recovery. If you cannot safely retrieve it, get professional help. Never exceed the cleaning kit’s rated reach.
If you cannot safely clean the entire exhaust route, don’t assume the portion you reached represents the entire system.
Step 5: Clean the outdoor vent opening
If the exterior dryer vent is safely accessible from ground level, inspect the opening and remove reachable lint and debris.
Make sure the exterior damper or flap can move freely.
Do not force the flap or reach deeply into the opening.
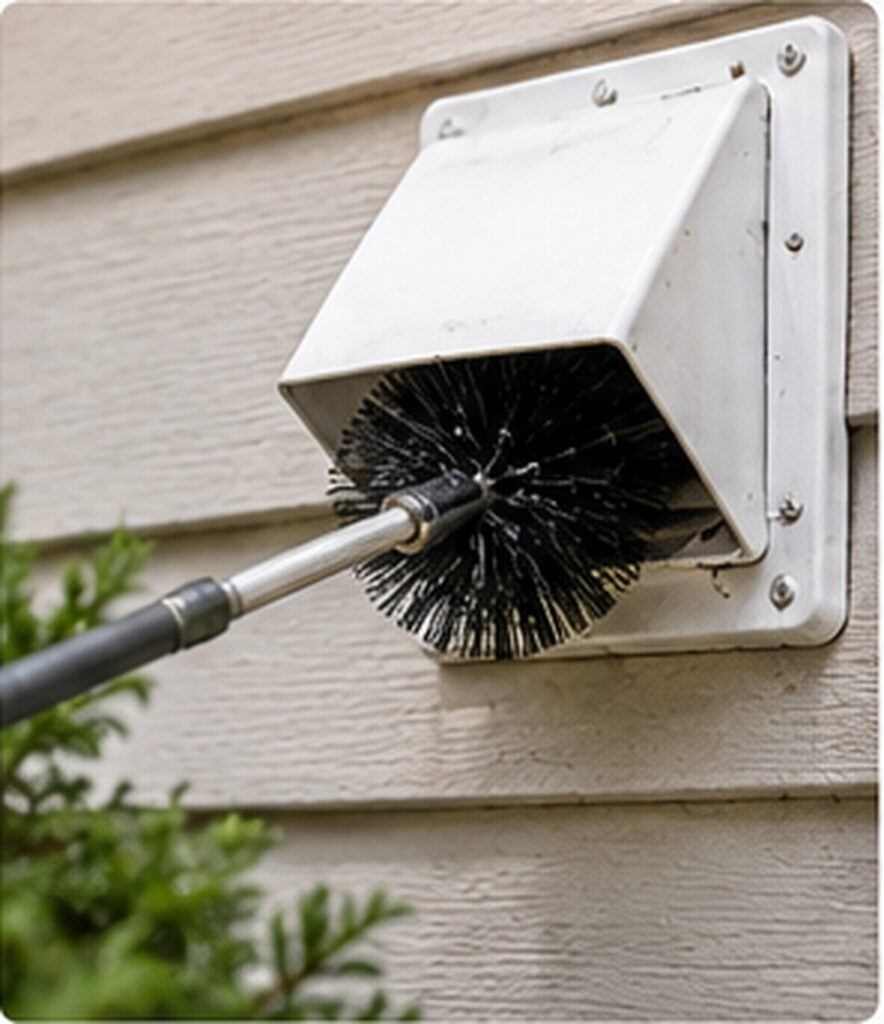
If you find nesting material or evidence of animals, stop. Do not push a brush through a nest or disturb an active animal nest.
Reconnect the Vent Correctly
Before reconnecting the dryer, remove loose debris and make sure you have accounted for all of your cleaning rods, brushes, and tools.
Inspect the visible connections again.
Reconnect the transition duct using the fastening method required for your dryer and vent system. Make sure the connection is properly seated and secure.
Avoid screws or other fasteners that protrude into the airflow path because they can catch lint.
Do not use ordinary cloth duct tape as a substitute for the appropriate connection or sealing method.
Once the vent is connected, carefully return the dryer to its normal position.
Watch the transition duct as you move the appliance. A clean vent can quickly become a restricted vent again if the duct is crushed or sharply kinked behind the dryer.
If you cannot confirm that the connection remains secure after moving the dryer back, stop and have the installation checked.
Test the Dryer After Cleaning
Do not operate a vented dryer with the exhaust disconnected or with warm air discharging into the home.
Once everything has been properly reassembled, restore power and allow the dryer to operate normally.
Stay nearby during the first cycle.
If the exterior vent is safely accessible, observe whether the damper opens while the dryer operates.
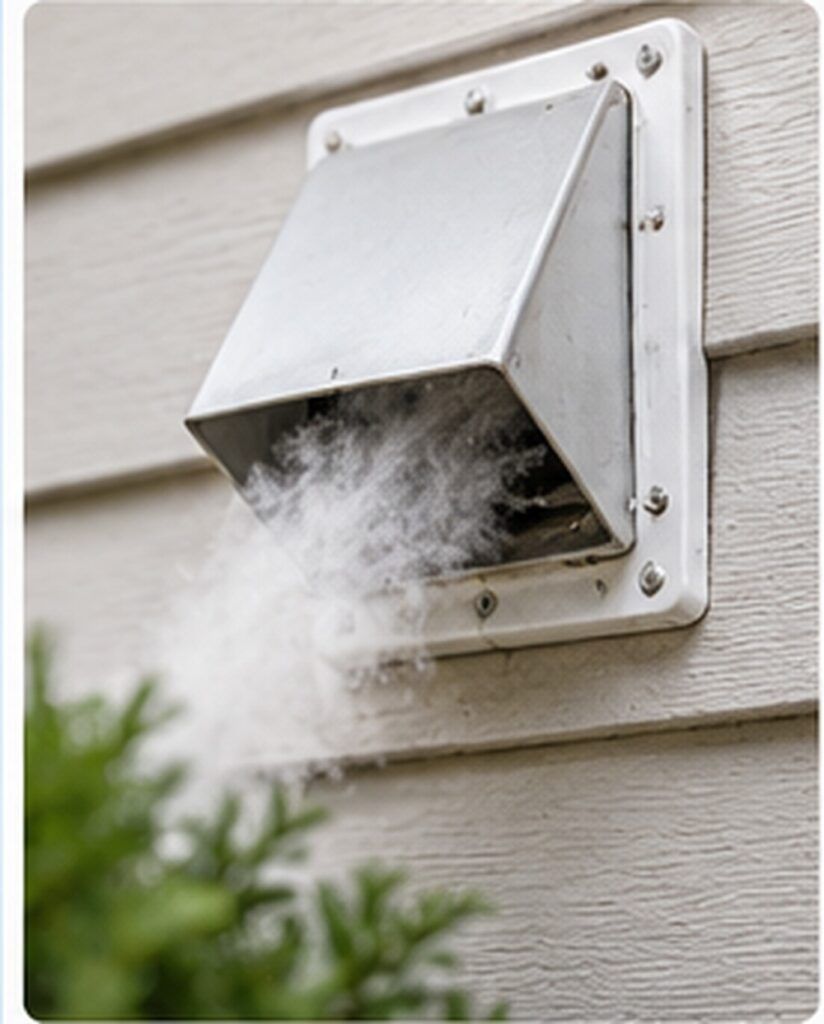
You should be able to feel warm exhaust air moving from the exterior vent. The exact amount of airflow varies by dryer and vent system, so this observation should not be treated as a precise airflow test.
Keep your hands and tools away from the moving damper and exhaust opening while the dryer is running.
Remember that damper movement is only one observation. It does not prove that the entire exhaust system is free of restrictions.
If drying remains unusually slow, the dryer becomes excessively hot, the exterior airflow seems weak, or you notice another warning sign, stop using the dryer until you determine the cause. Manufacturers identify restricted or crushed venting as a possible cause of long drying times. Product Help | Whirlpool
How Often Should You Clean a Dryer Vent?
There is no single cleaning interval that applies to every dryer installation.
The CPSC recommends cleaning the dryer vent and exhaust duct periodically, while manufacturer recommendations can vary. For example, Whirlpool currently recommends cleaning the home venting every one to two years or as needed when drying performance decreases. U.S. Consumer Product Safety Commission
Follow the maintenance recommendations for your specific dryer and vent system. The amount of use, length and routing of the duct, and conditions around the appliance can all affect how often attention is needed.
Don’t wait for a calendar reminder if the dryer starts showing signs of a possible airflow problem.
Watch for changes such as:
- Clothes taking longer than usual to dry
- Excessive heat
- Weak airflow at the outdoor vent
- A damper that barely opens
- Repeated lint buildup
- Moisture or unusual conditions around the vent
- A burning or scorched smell
These symptoms do not prove that the vent is clogged, but they are reasons to investigate the exhaust system.
Continue cleaning the lint screen after every load. Cleaning the exhaust vent does not replace that basic maintenance. U.S. Consumer Product Safety Commission
When Should You Call a Professional?
A dryer vent cleaning guide can help with straightforward systems, but knowing when to stop is just as important as knowing how to clean the vent.
Arrange professional help if:
- The vent exits through the roof.
- The exterior outlet is too high to access safely.
- The duct is long, complicated, or largely concealed.
- You cannot determine where the duct runs.
- The vent is damaged.
- You encounter a heavy blockage.
- You find a nest or animal obstruction.
- The brush becomes stuck.
- The system uses an inline fan or other equipment you cannot identify.
- You cannot safely reconnect the vent.
- Drying remains unusually slow after cleaning.
- You notice excessive heat, a burning smell, or another safety concern.
A professional cleaning or appliance diagnosis may be necessary depending on what you find.
Most importantly, don’t turn a routine maintenance job into a repair you aren’t equipped to handle.
Dryer Vent Cleaning FAQ
Can I clean my dryer vent myself?
Yes, if the vent is straightforward, accessible, and safe to work on.
Short, uncomplicated systems may be suitable for a homeowner with the correct equipment. Long, concealed, roof-level, damaged, or complicated systems are better handled professionally.
Can I use a vacuum to clean my dryer vent?
A vacuum is useful for collecting loose lint around accessible openings and portions of the vent you can safely reach.
However, a vacuum alone may not remove lint farther down the exhaust duct or material attached to the duct walls.
Should I clean my dryer vent from inside or outside?
That depends on the vent layout and the cleaning equipment you’re using.
Some systems can be cleaned from an accessible indoor connection, while others may be better suited to cleaning from the exterior. Follow the cleaning kit’s instructions and don’t force equipment through a route you cannot safely identify.
Can I use a leaf blower to clean my dryer vent?
Don’t substitute a leaf blower, compressed air, or another improvised method unless the equipment and vent manufacturer specifically provide instructions for that application.
A controlled dryer vent cleaning kit is a better choice for a homeowner cleaning a suitable system.
What if my dryer still takes too long to dry after cleaning the vent?
Don’t assume the vent is still clogged.
Slow drying can also involve the load, cycle selection, laundry coming from the washer unusually wet, or a problem within the dryer itself.
If the problem continues after the accessible vent has been properly cleaned and reassembled, the dryer or exhaust system may need further diagnosis.
Final Takeaway
A dryer vent cleaning guide is useful when the goal is to maintain a straightforward system safely, but cleaning is only part of the job.
Know what you’re cleaning, use equipment that’s appropriate for the vent, work slowly, and stop when the installation is beyond what you can safely access.
A clean vent is helpful, but a properly installed, intact, and unobstructed exhaust system is what you’re really trying to achieve.
Thanks, Greg, for drawing a clear line between a manageable dryer vent cleaning job and one that needs professional help. Being able to reach a section of duct isn’t the same as knowing the whole exhaust route is clear, and that distinction deserves more attention in DIY discussions.
The reassembly step also deserves a spot on the maintenance checklist rather than feeling like an afterthought. Getting the lint out is only part of the job if pushing the dryer back into place leaves the connection crushed or insecure.
Thanks for the thoughtful comment. I completely agree. Removing the lint is only part of the job. Making sure the vent is securely reconnected and not crushed or kinked when the dryer goes back into place is just as important. And if you can’t access the entire vent run, that’s a good time to consider calling a professional. Thanks for adding to the discussion!
How can a homeowner tell if the transition duct behind the dryer is actually the correct type and safe to keep using? You mention replacing damaged or unsuitable material, but I think many people would not know the difference between foil, plastic, semi rigid, and other vent materials just by looking at them. Are there any easy signs that tell you the duct should be replaced even if it does not have obvious tears or holes?
That’s a great point. As a general rule, I recommend replacing plastic or very thin foil-style transition ducts. A safer choice is a UL-listed semi-rigid or flexible metal transition duct designed specifically for clothes dryers. Even if the old duct isn’t torn, I’d replace it if it’s crushed, kinked, excessively long, sagging, or has a lot of tight bends that can restrict airflow and collect lint. This is definitely something I should cover in more detail in a future article. Thanks for bringing it up!