
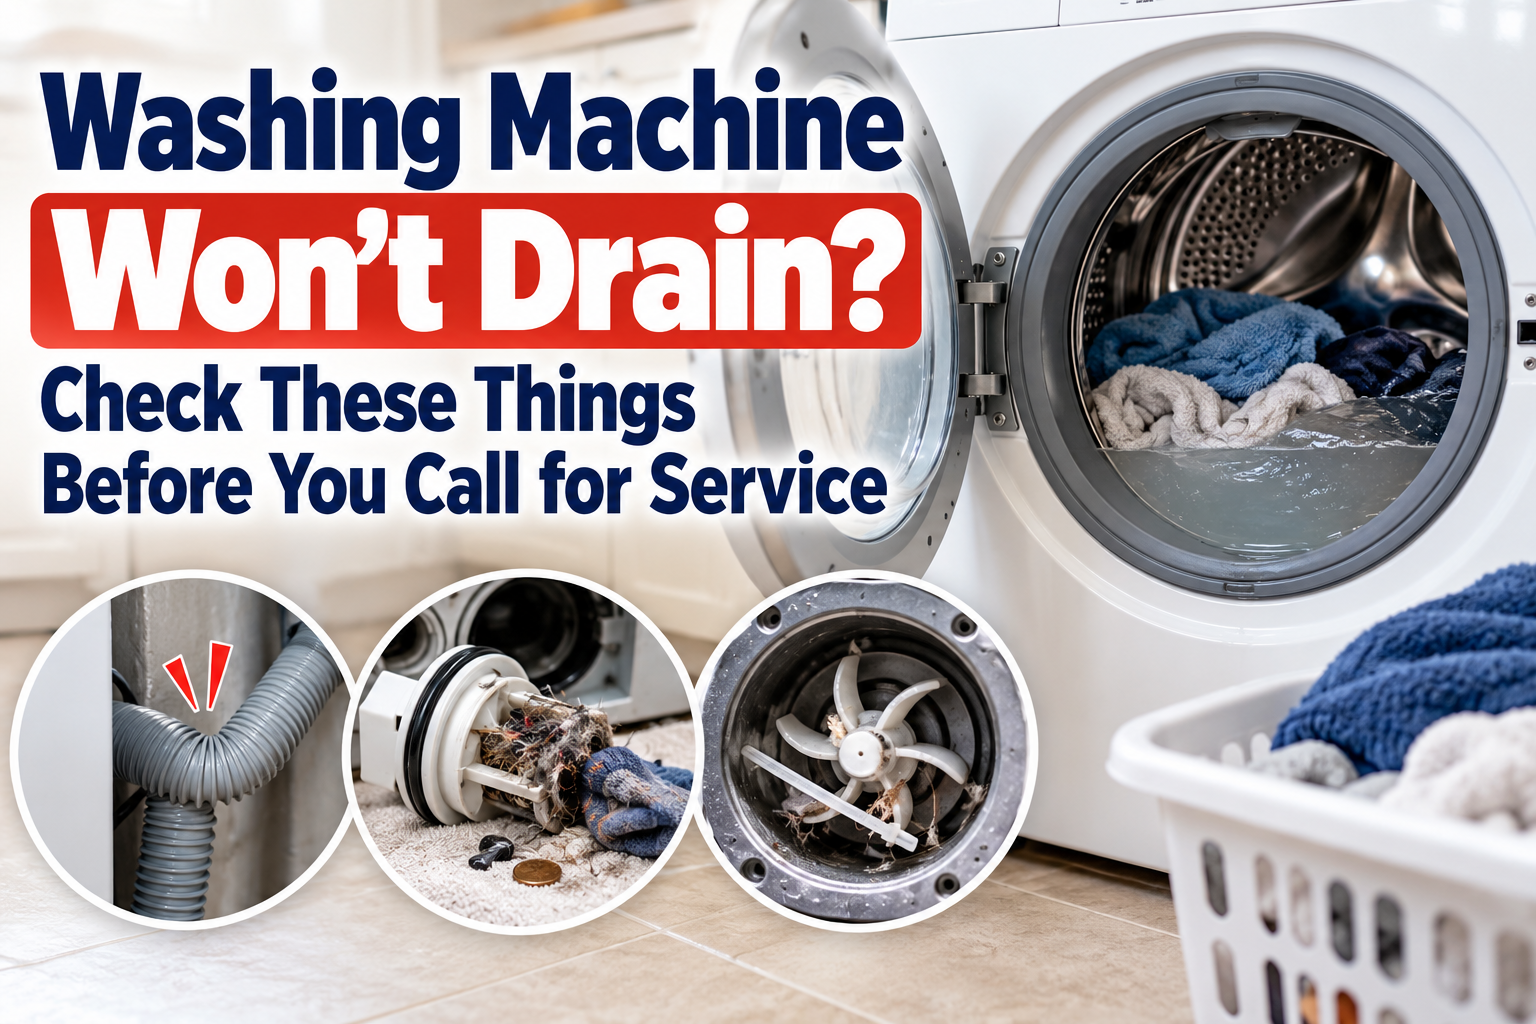
A washing machine that stops mid-cycle full of water is one of the most common calls a technician gets, and it’s also one of the easiest problems for a homeowner to diagnose without paying for a service visit. Before you assume the pump is shot or the control board has failed, there’s a specific order worth checking, starting with the cheapest and simplest possibilities first. Most of the time, the fix costs nothing but a few minutes with a towel and a flashlight.
This guide walks through that order the same way a technician would, from the drain hose all the way to the pump, so you can figure out what’s actually wrong before you call anyone or order a part.
What Makes a Washer Stop Draining in the First Place
A washing machine drains by pumping water out through a hose, usually into a standpipe or a laundry sink. For that water to leave the tub, three things have to work together: the path has to be clear, the pump has to be able to spin, and the pump has to actually be getting power to run.
When something interrupts any of those three, the washer will fill, agitate or spin for a bit, and then sit there with the tub full of water instead of finishing the cycle. The control board usually isn’t the problem. In most cases, it’s something physical blocking the flow, and that’s good news, because physical blockages are usually things you can clear yourself.
Start With the Drain Hose: Kinks, Clogs, and Height Problems
The drain hose is the first thing to check because it’s the easiest to reach and the easiest to fix. Pull the washer away from the wall far enough to see the whole hose, from where it connects to the back of the machine to where it empties into the standpipe or drain.
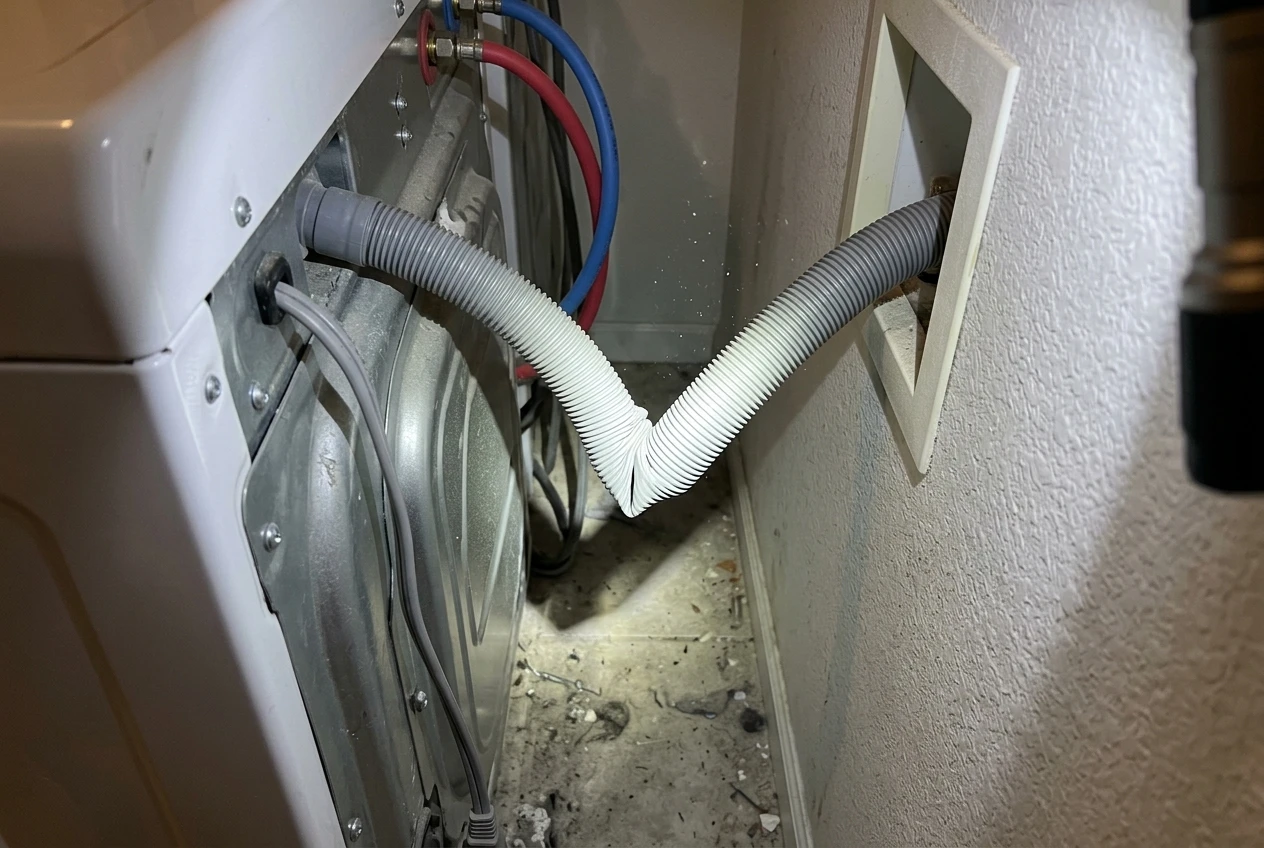
Look for:
- A kink or sharp bend, especially where the hose gets squeezed between the washer and the wall. Even a partial kink can slow drainage enough to trip an error code or stall the cycle.
- A clog inside the hose. Lint, small socks, and soap residue can build up and narrow the opening. Disconnect the hose and look through both ends with a flashlight. If you can’t see light all the way through, there’s a blockage.
- Incorrect height. The drain hose needs to form a loop that rises above the water level in the tub before it goes down into the standpipe. If someone pushed the hose in too far or routed it in a way that eliminates that loop, water can siphon back out of the standpipe and confuse the machine into thinking it isn’t draining properly, even when the pump is working fine.
If you find a kink, straighten it and secure the hose so it can’t get pinched again. If you find debris, flush the hose out with water from a sink or hose bib before reconnecting it.
Clean Out the Pump Filter (Most Common Fix)
If the hose checks out, the next stop is the pump filter, and this is where the problem turns up more often than anywhere else on the machine. Most front load washers, and some top loaders, have an access panel near the bottom front of the cabinet. Behind it you’ll find a small round filter that catches coins, buttons, hair ties, lint, and anything else that makes it past the tub but shouldn’t go through the pump.
Before you open it, unplug the washer. Water will spill when you pull the filter, sometimes more than you’d expect, so keep a shallow pan and some towels ready. Many of these filters have a small drain tube built into the housing. If yours does, open that first to let the water out slowly before removing the filter itself.
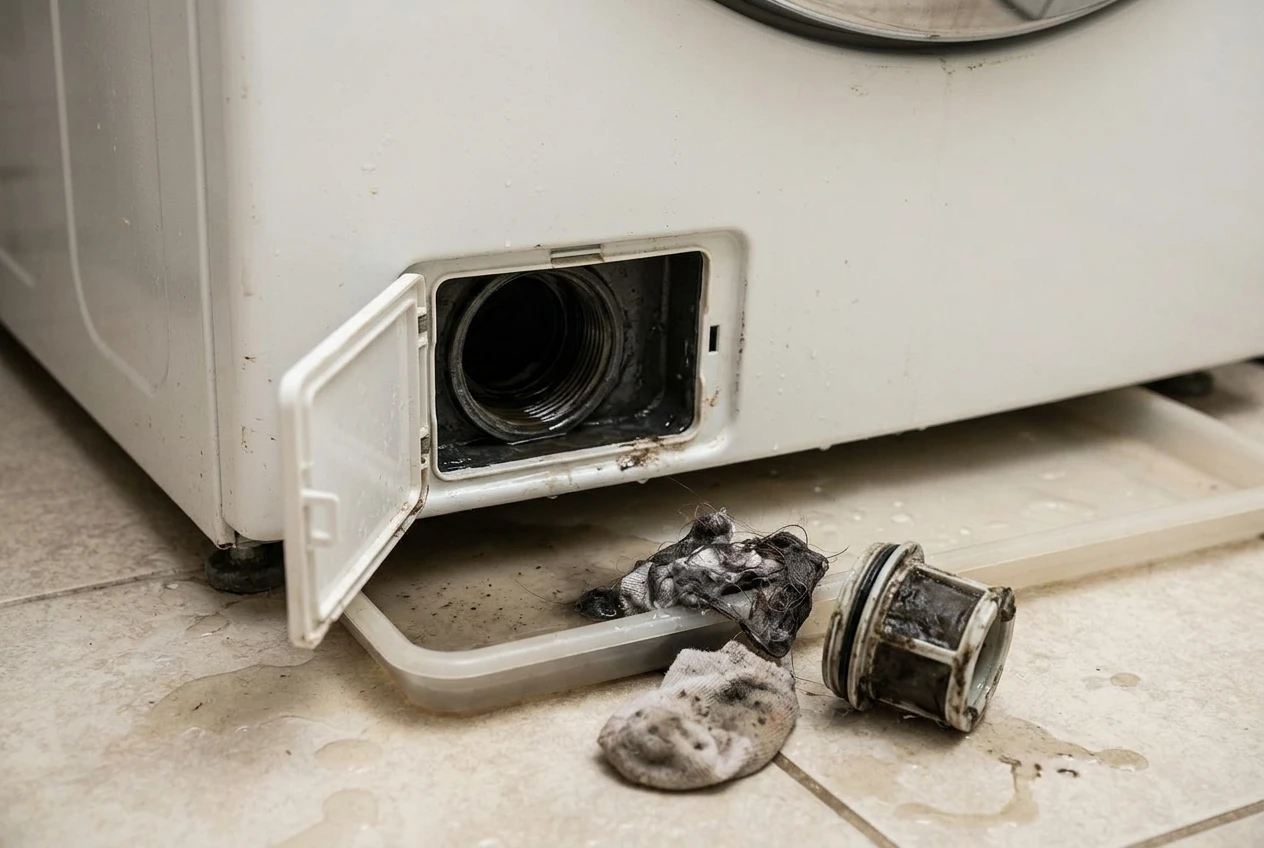
Once it’s out, you’ll usually see exactly why the washer stopped draining: a sock, a hair clip, a wad of lint, or a buildup of gunk that’s narrowed the opening to almost nothing. Clean the filter thoroughly, check that the threads aren’t cracked, and reinstall it snugly. This single fix solves a large share of “won’t drain” complaints, and it costs nothing but a little time and a towel.
Check the Drain Pump for a Jam or Failure
If the filter was clear and the hose wasn’t blocked, the drain pump itself is next. Sometimes an object slips past the filter and lodges directly in the pump’s impeller, the small finned wheel that pushes water out. With the washer unplugged, you may be able to reach the pump through the same access panel or from behind the machine, depending on the model.
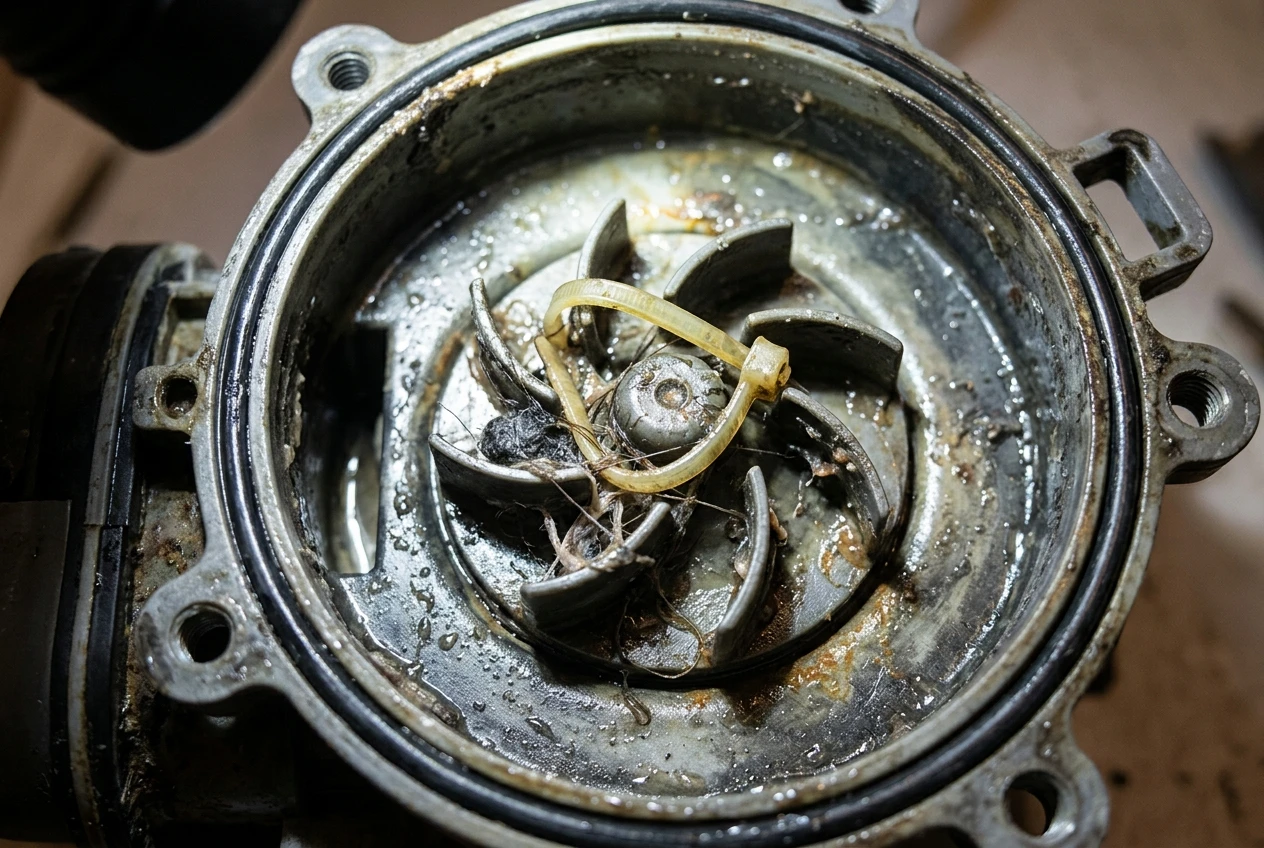
Look for anything caught in the impeller blades. A zip tie, a bra underwire, or a small bit of plastic can jam it just enough to stop it from spinning, even though the motor is still trying to drive it. If you find something lodged there, remove it, spin the impeller by hand to make sure it turns freely, and test the washer.
If the impeller spins freely and nothing is jammed, but the washer still won’t drain, the pump motor itself may have failed. These motors burn out over time, especially on machines that are several years old. A failed pump usually needs to be replaced rather than repaired, since the motor and impeller are typically sold as a single assembly.
Rule Out a Clogged Standpipe or Household Drain Line
It’s easy to assume the problem is inside the washer, but sometimes the blockage is downstream, in the household plumbing the washer drains into. If water backs up out of the standpipe, pools around the drain, or the washer seems to strain and then back up rather than failing to pump at all, the clog may be in the drain line itself rather than in the machine.
A quick way to check is to run water into the standpipe directly from a bucket or hose, bypassing the washer entirely. If that water drains slowly or not at all, you’re dealing with a household plumbing clog, not a washer problem, and a plumbing snake or a call to a plumber is the right next step rather than replacing washer parts.
Front Loaders vs Top Loaders: Where to Look First
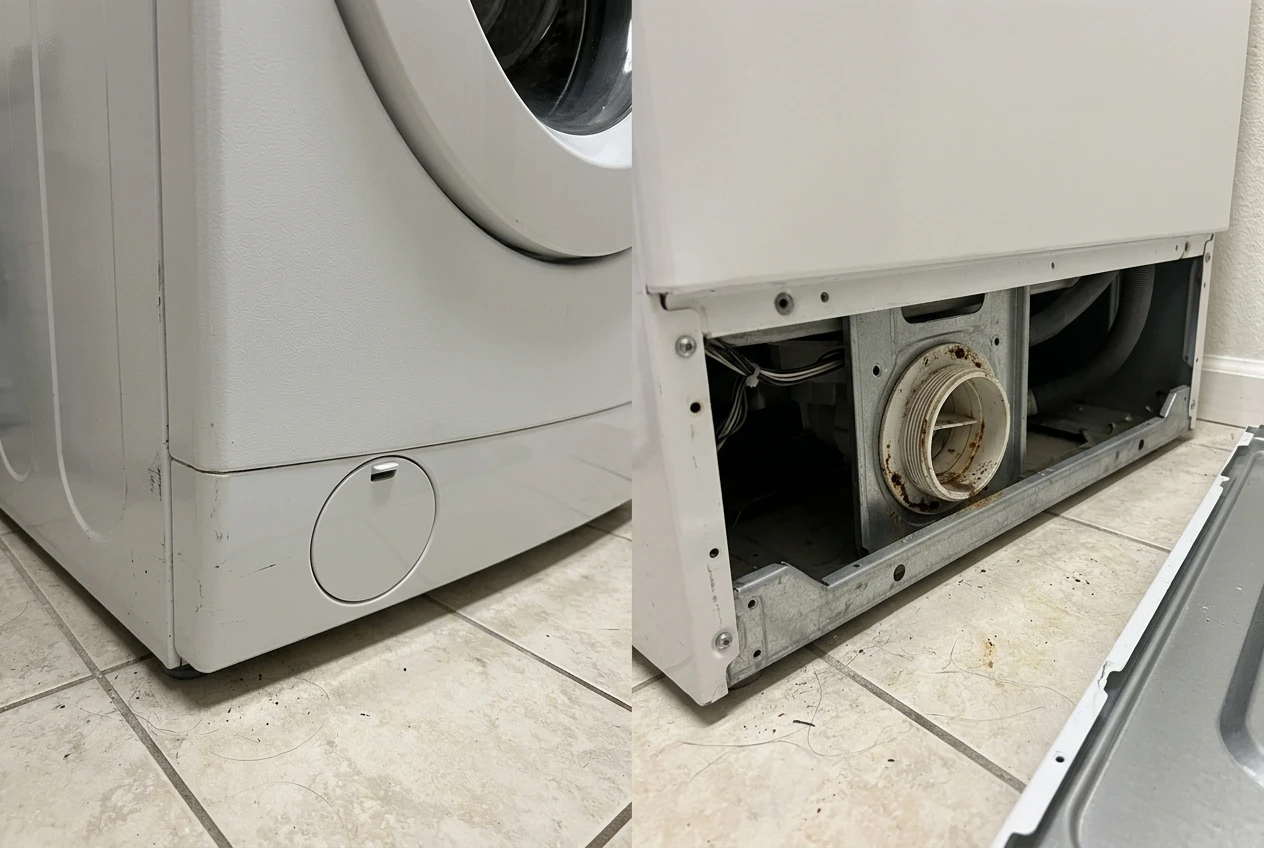
The order above applies to both types, but where you’ll find the parts differs a bit.
Front load washers almost always have an accessible pump filter behind a small panel at the bottom front of the cabinet. This makes the filter check quick and should be your first stop after the hose, since these machines are especially prone to trapping small items from pockets.
Top load washers vary more by brand and age. Some older top loaders use a simple pump with no accessible filter at all, which means a clog has to be cleared by removing the pump itself. Newer top loaders, especially high-efficiency models, often do have a small filter similar to what you’d find on a front loader, usually tucked near the base of the cabinet or behind a lower kick panel. Check your owner’s manual or look for a small round access panel to find out which design you’re dealing with.
Signs the Problem Is Bigger Than a DIY Fix
Most draining problems trace back to a clog somewhere in the system, and those are well within reach of an average homeowner. But a few signs point to something that may need a technician’s attention:
- The pump runs (you can hear it humming) but no water moves at all, suggesting a cracked impeller or a failed pump that needs replacement.
- You hear a loud grinding or rattling from the pump area even after clearing debris, which can mean a bearing has failed inside the pump itself.
- The washer drains fine sometimes but not others, which can point to a failing drain pump motor, a loose wire harness connection, or in some cases a control board issue, since intermittent problems are harder to pin down than consistent ones.
- Water is leaking from the pump housing itself rather than just from the hose connections, which usually means the pump needs to be replaced.
If you’ve worked through the hose, filter, and pump checks and you’re still stuck, it’s reasonable to call in a professional at that point, especially if you’re not comfortable removing and replacing the pump assembly yourself.
Keeping Your Washer Draining Properly Going Forward
Once you’ve got the washer draining again, a few habits will cut down on repeat problems. Empty pockets before every load, since coins, tissues, and small items are the main cause of clogged filters and jammed pumps. If your washer has an accessible filter, clean it every few months rather than waiting for a problem to force the issue. And keep an eye on the drain hose anytime you move the washer for cleaning behind it, since it’s an easy thing to accidentally kink or push in too far when sliding the machine back into place.
A washer that drains slowly or struggles occasionally is often giving you an early warning before it stops draining altogether, so it’s worth checking the filter at the first sign of trouble rather than waiting for a full stoppage.
Start with the simplest checks first: inspect the drain hose for kinks or clogs, then clean out the pump filter if your machine has one you can access. Always unplug the washer before opening anything, and have a towel and shallow pan ready, since water will spill when you open the filter or disconnect the hose. If you trace the problem to a failed drain pump, write down your washer’s full model number from the data plate before shopping for a replacement part, so you order the exact match the first time rather than guessing and sending back the wrong one.
If your washer shares a wall with the dryer, it’s worth keeping that vent clean too, since lint buildup causes its own set of problems. Our dryer vent cleaning guide walks through that process step by step.
If you’ve gone through all of this and you’re still not sure what’s causing your washer to stop draining, leave a comment with the brand, the full model number, and what you’re seeing. That information makes it a lot easier to point you toward exactly what to check next.